I read a lot of books and posts, listen to a lot of podcasts, and watch a lot of video. I also make a lot of notes about the ideas I encounter along the way.
A while back, I decided I wanted these sources and my notes on them to inspire more books, posts, and podcasts of my own. With that goal in mind, I started using a remarkable tool called Obsidian to capture notes and explore connections between them. Getting the most out of Obsidian required me to build new habits, experiment with new processes, and conceive new structures for my collection of notes.
With an eye toward helping others make the most of their own systems, I decided to write about the process I use when making notes on books. (I use a similar process for making notes on posts, videos, and podcasts, but in this post, I’m focusing on books for simplicity’s sake.) While doing so, I learned a lot about my process — including its many inconsistencies, rough edges, and patches.
As with any system that has evolved over time, my process turned out to be less of a well-oiled machine and more of a crazy quilt of new ideas and legacy habits. In writing about the way I work, I found lots of room for improvement. As it turns out, writing about a process is a really good way to rethink and revise that process!
My process, then, continues to evolve. This post is a snapshot of my process as it looks on Wednesday, April 13, 2022. In sharing it, I’m not prescribing it, as I suspect each person really needs to create a process of his or her own. Instead, I’m hoping this post can inspire you to write about your own process, to experiment with any of my ideas that resonate, and to share the results with the rest of us.
Components of the System
I use one thought processor: Obsidian.
I maintain just five top-level folders:
- Archives (for completed projects and published work)
- Journal (for Daily Notes)
- McMind (my database of inter-linked notes)
- Projects (active projects only, each in its own folder)
- Resources (attachments, notes generated by automated systems, resumes, medical info, templates).
I work with seven kinds of notes, each based on its own template:
- Daily notes
- Source notes
- Reading notes
- Thinking notes
- Highlights notes
- Author Notes
- Idea Notes.
I establish connections and relationships among notes using links.
I use tags almost exclusively to indicate status.
These values have guided the evolution of my system so far:
- Minimize friction to encourage the note-making habit.
- Employ just enough structure to facilitate easy retrieval.
- In lieu of many folders, use links, tags, and searches to resurface and organize notes as needed.
- Minimize administrative overhead to maximize creative time.
- Avoid complexity for complexity’s sake.
Tracking Sources
I refer to books, videos, podcasts, or posts as sources. Not all sources are worth tracking. But as soon as I realize a source will be significant, I acknowledge that by creating a source note.
A source note is a bit like a card catalog entry. It becomes the anchor point for any and all mentions of a source in my Obsidian vault.
For example: when I began reading Priya Parker’s excellent The Art of Gathering, I created a new note called “The Art of Gathering.” Next, I hit Shift-Command-T and typed S to populate this fresh, blank note with my source note template.
The Source Note Template
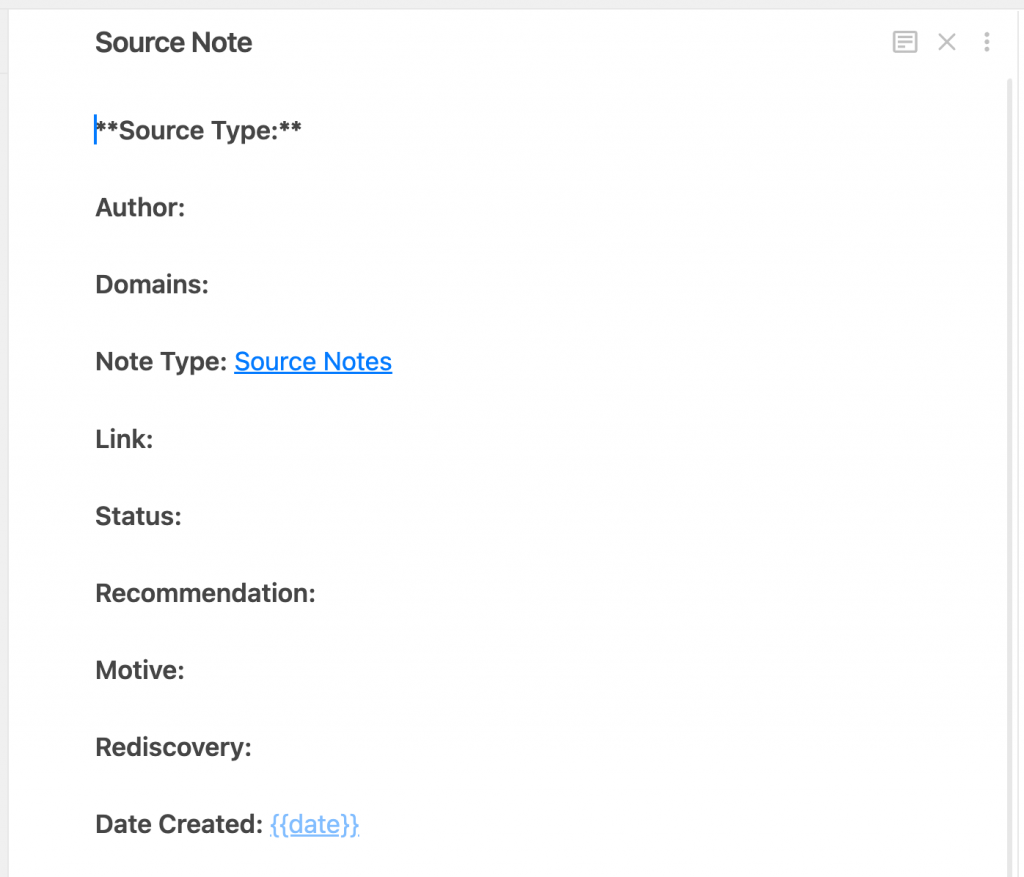
Refined over the last two years, my source note template provides a consistent set of fields I can use to describe any source (and find it again when needed). The first version of this template captured a lot of information I never used. But now, I’ve reduced my administrative work by limiting the metadata I capture.
Here’s how my source note looks for The Art of Gathering:
- Title: The Art of Gathering
- Source Type: [[Book]]
- Author: [[Priya Parker]]
- Domain(s): [[Adaptive Strategy]]
- Note Type: [[Source Notes]]
- Link: https://amzn.to/3KsW8mc
- Status: #Completed
- Recommendation:
- Motive: I saw references to this book when reading[[ Braiding Sweetgrass]], and wondered how many of its principles might be adapted for use in [[Adaptive Strategy]] and [[Facilitation]] work I’m doing. Can I plan better classes and events with these principles?
- Rediscovery: When planning an [[Adaptive Strategy]] session,[[ Integrated Decision-Making]] session, or other [[Facilitation]]. Also: party planning, creating guest lists for events, for before attending my next conference or meeting.
- Date Created: [[2021-07-08]]
Completing Source Template Fields
- The title of the book becomes the title of the note.
- The source type field tracks whether the source is a book, video, podcast, or post. I surround these entries with square brackets, making them into links. As a result, when I visit the Book note, I’ll see in its links sections a list of all the Books in my vault.
- The author field is self-explanatory. The author’s name is linked, which creates an author note for that author.
- In my system, domains are the dozen or so areas of study that have sustained my interest over time or in which I have cultivated special expertise. (Examples include divination, fiction writing, and, here, adaptive strategy.) This entry is also linked, so I can track how many times a domain is referenced by various notes and quickly discover other sources and notes related to this area of study.
- The link is an Amazon affiliate link. Clicking the link gives me access to all of Amazon’s info on a book. Copying it gives me a handy affiliate link to share when recommending the book.
- Status is defined by one of several tags. For books, I use either ToRead for books I haven’t yet read. (When I’m looking for something new to read, a quick search on this tag provides me with a list of options.) Upon completing the book, I change this tag to Completed.
- The recommendation field reminds me who to thank (for the good reads) and who to annoy with prank phone calls (for the bad ones). When a name appears here, it’s linked to the note associated with that person.
- The motive field provides a place to record why I pursued or how I encountered a source. My motive statement will likely be peppered with links to various domains, other books, etc.
- The rediscovery field provides a place to anticipate a situation in which I’d like to rediscover this book. This statement will also incorporate links to domains, other books, events, or even specific dates. (As an aside, I’d like to note that adding the motive and rediscovery fields to my note-making templates has greatly improved the integration and contextualization of my notes over time. If you want to experiment with just one element of my practice in your own, give this one a try.)
- The date created field is automatically populated each time the source note template is invoked, thanks to a date code embedded in the template.
Filing Source Notes
Like all notes I create, source notes are filed in the McMind folder in my Obsidian vault.
Reading and Note Making
I read books almost exclusively in the Kindle app on my MacBook Pro, iPad, or iPhone. As I read, I’m doing any or all of the following three things.
1. Highlighting Passages of Interest
In the past, I employed an impulsive approach to highlighting. I highlighted key ideas. I highlighted summaries of those key ideas. I used highlights as waypoints, guiding me back to passages I found engaging. But most of the time, my highlights were the digital equivalent of shouting “Amen!” or “Yes!” whenever a bit of text resonated with me.
These days, my approach to highlighting is more mindful. As often as possible, I try to highlight complete, stand-alone phrases. Before highlighting key points in a chapter, I check to see if those points are expressed more concisely in a chapter summary. And while I may still use the occasional highlight to express excitement or agreement, I’m making more of an effort to highlight passages that challenge, support, or connect with ideas I’ve captured elsewhere.
Getting Highlights into Obsidian
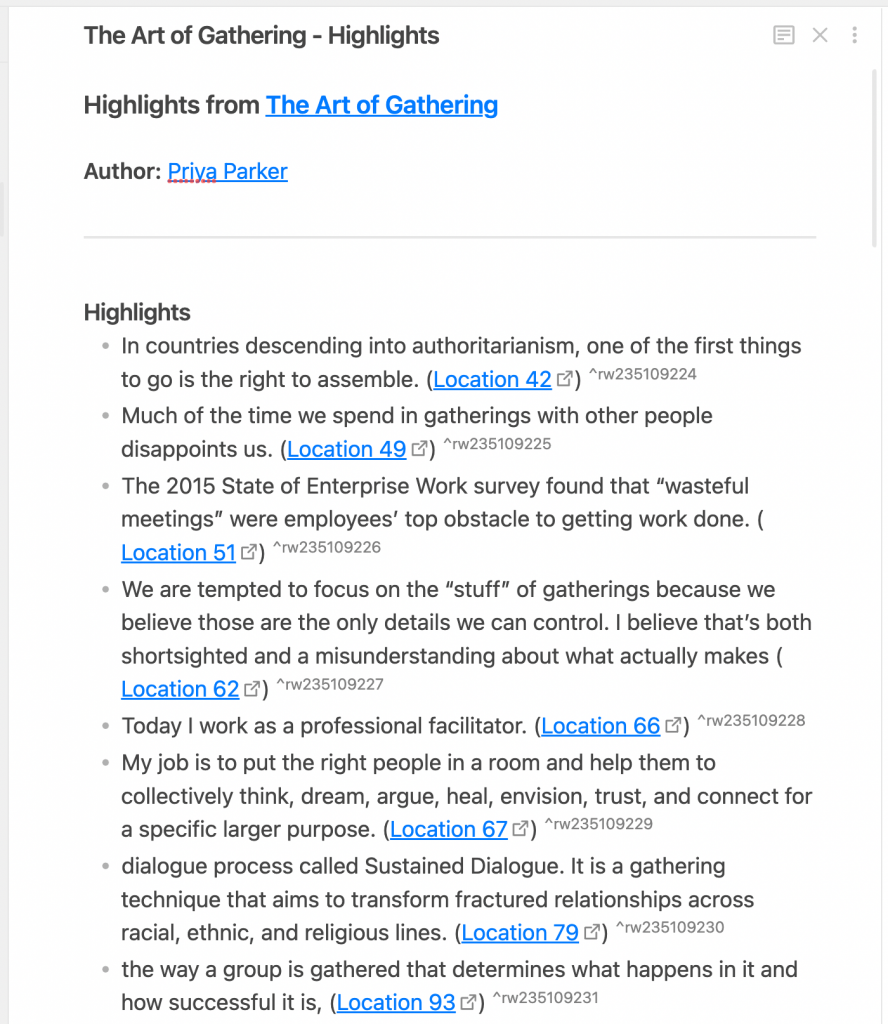
The Readwise service imports all my highlights into the Resources/Readwise folder of my Obsidian vault, creating a new highlight note for every source. Each highlight note contains all the highlights I made while reading a given source. For The Art of Gathering, the highlight note is titled “The Art of Gathering – Highlights”, and it contains every highlight I made while reading that book.
Readwise allows me to create or tweak a master highlight note template, defining the amount of metadata I want captured and the format in which it’s presented. If I return to an old source and make new highlights, Readwise appends new highlights to the end of the related highlights note.
Why Not just use Highlights Notes as Source Notes?
Readwise creates a unique highlight notes for every source in my Kindle library. At one point, I made the mistake of thinking, “Hey, why not just use the Readwise highlights note as the source note for each book I read and link every mention of that book to the highlights note?” Ultimately, I even went so far as to edit the Readwise template to include space for all the reading and thinking notes I made for each book (and bragged about having done so on Twitter).
Initially, there was something psychologically comforting about about having every scrap of metadata, all highlights, and all my notes from a book on one lengthy, complex page. In practice, though, these notes became unwieldy and less useful. Worse, they also became less reliable … as I discovered when I tweaked my Readwise template, forced a refresh of all highlight notes to keep them uniform, and lost the reading and thinking notes I had typed into my Readwise highlight notes!
Based on that experience, I decided I don’t want to enter my personal observations into any note that an automated process can overwrite. So for now, I’m letting source notes be the authoritative anchor point for any source I consult, letting highlight notes be highlight notes, and creating my own notes using purpose-made templates for reading and thinking notes.
2. Making Reading Notes
When I encounter useful content while reading, I preserve it in a reading note. A reading note captures or summarizes an author’s ideas in my own words.
My approach to making reading notes is “atomic” — that is, each idea or insight gets its own short, stand-alone note. I adopted this practice after noticing that longer notes felt cumbersome. I’ve also noticed that atomic notes “dance together” more easily. For some reason, for me, establishing surprising or meaningful connections between many short notes is easier than with longer ones.
Typing Command-T and pressing R calls up my reading note template. The first line of the template — which simply says “Content Here” — gets replaced with my rephrasing of the idea that caught my attention. I put this first because I prioritize capturing a thought while it’s hot. That done, I fill out the various metadata fields that follow.
Here’s an example of a reading note from The Art of Gathering:
Parker asserts that exclusion is critical to an effective gathering, flying in the face of the familiar “the more, the merrier” mentality. Strategy, she argues, requires exclusion. Being able to say “No” to certain attendees means we’ve hit upon a truly strategic purpose for a gathering.
Source: The Art of Gathering
Domain(s): Adaptive Strategy, Diversity. Inclusion
Note Type: Reading
Motive: Having spent thirteen years in a corporate culture that spotlights inclusion and diversity, this statement initially raised my hackles. But after recalling the wisdom of another statement related to exclusion and strategy (“If you aren’t saying no to some opportunities, you don’t have a strategy”), I could see Parker’s point: if your gathering is important enough to hold, then its purpose is worth defending … and that may mean excluding some people whose presence doesn’t support that purpose.
Rediscovery: When creating a guest list, when planning meetings for [[Facilitation]], when planning my own events or parties, when in discussions about [[Diversity]] and the impact of the “everyone deserves a place at the table” philosophy.
Date Created:
The source field is for a link that ties this reading note back to the appropriate source note. Later, if I want to see all reading notes I’ve taken on a given source, I can visit the source note and see every reading note linked to that book, post, podcast, or video.
The domain(s) field associates this note with one of the dozen or so broad categories of interest I’m currently tracking.
The note type field is pre-filled with a link to a note to my Reading Notes page, where I can see a link to every Reading Note ever taken.
As they do in my source notes, the motive and rediscovery fields capture why I took this note and imagine the circumstances under which I’d like to see it resurface.
The date created field is filled out automatically thanks to a code embedded in the template.
How Do You Title Reading Notes?
The title for a reading note is generally a short summary of its contents, including a few words that capture the note’s key idea. For this note, I used the title, “Exclusion can be critical to strategy.”
Doesn’t Creating a Reading Note This Way Take a Lot of Time?
One might worry that filling out all these fields creates a lot of friction. In practice, though, filling out the template takes very little time … and, if I want to, I can reduce that time further by temporarily editing the reading note template to include a link to the source I’m working with.
I could reduce friction even further by skipping domain, motive, and rediscovery fields … but for me, the value of establishing context is worth the investment of a second or two.
Why not Enter All Reading Notes Directly Into the Source Page?
I did this for a while, but stopped for these reasons:
- I like the fact my source note has one function: to be the authoritative anchor point (or “card catalog entry”) for every source. Keeping other notes there dilutes that purpose.
- Cramming reading notes onto the source note makes that note too long to scan with ease.
- I like “atomic” notes, and have found that by keeping my reading notes short and sweet (and by linking them liberally to other concepts and ideas), my reading notes feel more nimble … and, for lack of a better way to describe this, I recall individual notes better when they are atomized (vs. when they appear alongside dozens of others on a single page).
Where Do You File Reading notes?
Like all notes I compose, reading notes go into my McMind folder.
A side note: during my “I ain’t gonna use no stinkin’ folders” phase, I kept all notes in the root directory of my vault. With time, though, I found that seeing all those notes listed in the sidebar was visually distracting and aesthetically displeasing.
3. Making Thinking Notes
As I’m reading, new ideas and insights pop into my head. Sometimes these are original observations. Other times, I may be suddenly reminded of notes I’ve made before that connect to, support, challenge, or contradict something I’ve just read.
When this happens, I record the idea or insight in a thinking note as quickly as possible. (Some people call these fleeting notes.) I summon my thinking note template by pressing Command-T and typing T. The first line is a placeholder I replace with my new thought. Once that note is recorded, I move on to the metadata fields:
- Source:
- Domain(s):
- Note Type: Thinking Notes
- Motive:
- Rediscovery:
- Date Created:
You’ll notice this template mimics the structure of my reading note template. (The only difference is the value the template plugs into the note type field.) This is deliberate, since deploying the same structure again and again helps make my use of these templates as automatic and instinctual (and therefore as frictionless) as possible.
In the same vein, my process for creating a thinking note mimics the reading note creation process. I make these notes as atomic as possible, link them liberally to other notes, and depend on the power of links and backlinks to help me surface the note at a useful time. And, as with reading notes, I give thinking notes short declarative titles laced with keywords to aid rediscovery.
Like reading notes, all thinking notes are filed in the McMind folder.
Step Three: Reviewing Highlights
Once reading and initial note making are complete (or well underway), I turn my attention back to the highlights imported by Readwise.
The highlights note for a given source is easy to find. I’ve set up Readwise to pump all such notes into my Resources/Readwise folder. I’ve also tweaked the template Readwise uses to create note titles that incorporate the book title plus the suffix “- Highlights.”
For example: for The Art of Gathering, there’s a source note titled “Art of Gathering” and a highlights note called “Art of Gathering – Hightlights.” That structure and titling scheme means I’ll rarely (if ever) confuse a book’s source note with its highlight note.
Once I open a highlights note of interest, I scan the bullet list of highlights. At this point, my scanning goes quickly, because it’s informed by my having:
- read the book
- made reading notes
- made thinking notes.
As I find highlights that reinforce, support, or conflict with notes I’ve made previously, I do one of two things:
- Open a new thinking note, embed the highlight of interest into that note, create context by linking, and then writing down my thoughts about that highlight, or
- Open a related reading or thinking note and embed the highlight of interest into that note, along with a few bullet points detailing why I thought this highlight related to the contents of the note.
Embedding the highlight into a note:
- Makes it clear, by means of formatting, that the text is a quotation from the book (not material I’ve rephrased or summarized)
- Eliminates the need to copy or retype the text
- Gives me a place to explore my thoughts about a highlight without typing those notes into the highlight note itself (where it could be over-written if the contents of the Readwise folder get refreshed).
- Makes it easy for me to track the influence of an idea (by seeing how often it’s linked to in my own work).
I file all highlight-related notes in the McMind folder of my Obsidian vault.
Observations on Living with This System
As I mentioned, writing this post made me see my own system with fresh eyes. Here’s what I’ve realized:
Benefits of This System
- For me, this has become a very low-friction system. Thanks to templates, minimal folder structure, and consistent note formats, information intake is fast and smooth.
- Atomized notes play well with my writing process, which incorporates searching and link-hopping to recall key information and generate ideas for new work.
- Adding the motive and rediscovery fields to my note templates has greatly increased serendipitous resurfacing of useful information at just the right time.
- Having a fairly consistent note structure speeds my note-making, as the consistent nature and positioning of the template fields further reduces cognitive drag.
Insights Gleaned from Writing this Post
- Until I started this post, I was keeping Source notes in their own Resources/Source folder. But when writing about that practice, I found myself asking, “Why?” Lacking a good reason for doing so, I got over myself and moved all Source notes to the McMind folder. This simplifies filing, streamlines my process, and makes everything more uniform.
- As I wrote this post, I discovered that some note templates had the same fields … but in a different order! I came up with a standard order and made it uniform across all note templates as much as possible.
- I used to have note metadata at the top of a post. But I’ve never really liked that … and decided to fix that before sharing my process with you. I find that my new method — having the note content first, followed by metadata — is much better! Now, when I can see only a few lines from a note in some kind of summary, the visible lines contain content, not metadata.
- Because my system has evolved over time, older notes don’t conform to my current structure. In the past, I’ve given into the temptation to spend hours (and sometimes days) going back and bringing these old notes into conformity with the new standard. Now, I’ve decided to update notes only as my work resurfaces them.
What will Your System Look Like?
If you have questions about my system or the choices that guided its creation, please feel free to contact me via Twitter. I welcome opportunities to rethink, revise, and reconsider how I’m working!
Meantime, here’s hoping this little tour inspires you to design a system of your own. In the end, all that matters is whether or not your system works for you!